


Conchas take me right back to childhood! On Sundays my dad would wake up before us all and go the the Carniceria to get fresh Carnitas, Tortillas and my most favorite, Conchas! Then we would all gather in the kitchen still in our P.J’s , to feast on carnitas, chat, laugh and just hang out. While I may not have realized it at the time it was such a great little tradition of ours. But our meal was never complete if we didn’t have conchas after! We also had to drink Pepsi with our Carnitas in the morning too, don’t knock it, its an amazing combination, and to this day I can’t eat Carnitas without having Pepsi (this might be the only time I drink soda lol).
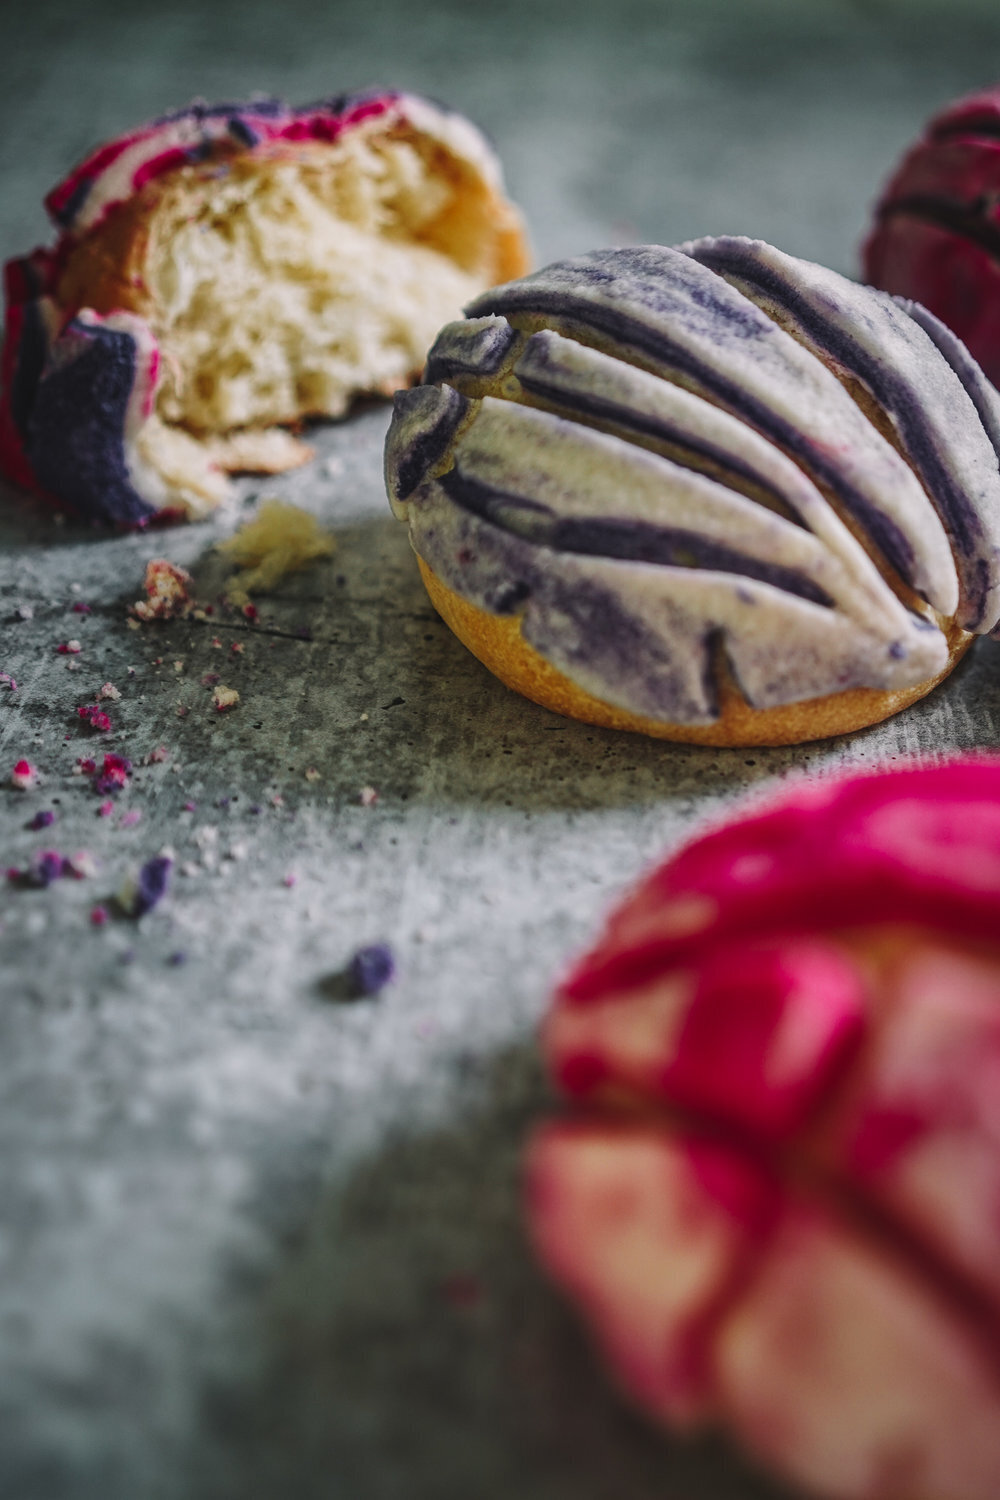
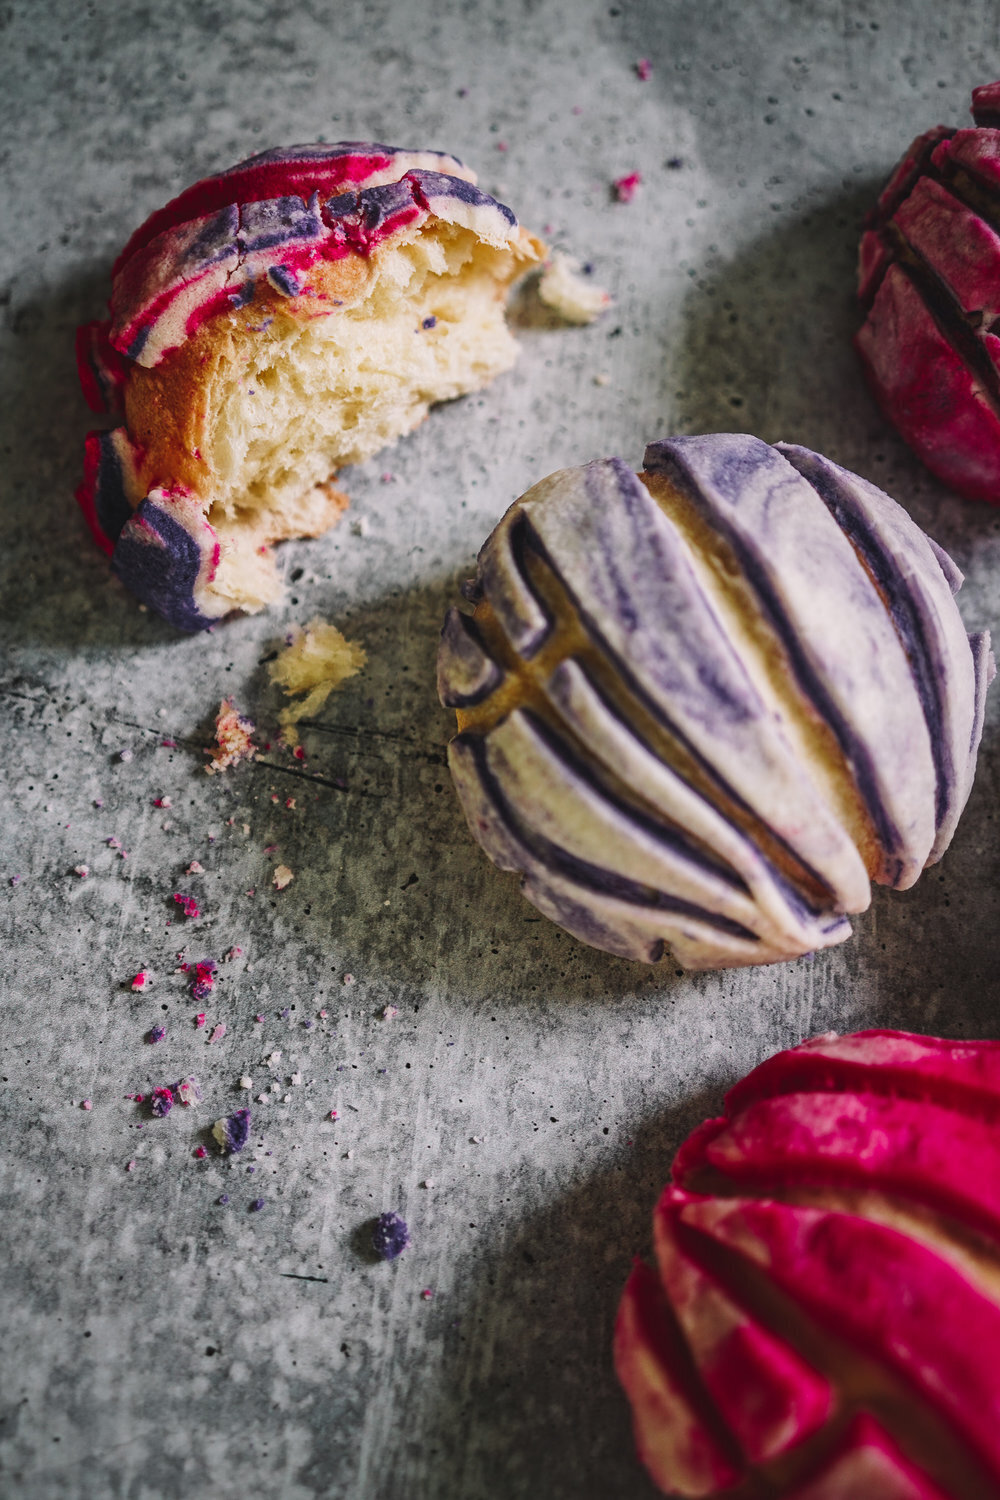
But these bright colored Mexican Sweet Bread have the most delicious sugar crust. Its probably the best part! But it hugs a dough that is ever so slightly sweet and together you get the crunch from the crust and the soft yeast dough underneath, they are spectacular!
These take a little time to make, but they are super easy to make, the longest part of it is letting the dough rise and impatiently waiting for them to come out of the oven! I like to make these with my munchkin because you can make the topping any color you want. The topping is very much play dough like before you bake it, so my little one loves to mix the color into the dough and create all sorts of patterns and colors. Its a great food for kids to make!
So here it is the recipe for my childhood favorite, Conchas!
CONCHAS
Recipe makes 16 Conchas
For the Dough:
-
500 grams (3-3/4 cups) Bread Flour, plus extra for dusting
-
125 grams (1/2 cup + 2 Tbsp) white Sugar
-
7.5 grams ( 2- 1/2 tsp) Active Dry Yeast
-
3 grams (1/2 tsp) Salt
-
100 grams ( 1/2 cup) Non-Salted Butter, at room temperature
-
100 grams ( 6 Tbps or 1 Extra-Large) Eggs
-
5 ml (1 tsp) Vanilla extract*
-
120 ml (1/2 cup) Milk (warm)
For the Topping:
-
125 grams (2/3 cups) Vegetable Shortening
-
125 grams ( 1 Cup plus 2 Tbsps) Confectioner Sugar
-
150 grams (1-1/8 cup) All-Purpose Flour
Dough Directions:
Mix the all-purpose flour, yeast, sugar, and salt in the bowl of a stand mixer at medium speed, just to mix it well.
Add the butter and mix well (using the stand mixer with the hook attachment), then mix in the eggs and vanilla extract and slowly pour the milk in little by little until the dough looks cohesive (you may need less or more milk, as some flours soak up more liquid than others). Keep beating the mixture for about 7 minutes at medium speed. Add a little more flour around the inside of the bowl (2-3 tablespoons), just enough for the dough to separate from the container. The dough should be soft and slightly sticky.
Place the dough on your floured working table and knead it just enough to shape it into a ball.
Place this ball in a large greased bowl to rest. Cover it with a plastic wrap (or wax paper) and a kitchen napkin. Let the dough rest in a warm place for about 2 hours until it doubles in size. I usually turn the light on in my oven and place the bowl inside, close to the light. Be aware that if your kitchen is cold, the dough will take longer to rise.
Make the Topping:
While the dough is rising, you can prepare the sugar topping. Soften the shortening with your spatula until it is very creamy, and then add the confectioner’s sugar. Finally, add in the flour little by little. Once the topping is mixed, divide the topping into equal amounts and color with food coloring to your liking.
Bake:
Once the dough has risen and doubled in size, place it onto a floured surface and let it rest for about 5 minutes. Divide the dough into 16 small balls (60 grams each I like to weigh them to ensure they all bake the same). To shape the balls, lightly flour your hands and place each small ball on the working surface and gently press down with your hand, rotating your hand to form the balls.
Using your hands, grease the top of each ball with a little shortening this helps the topping adhere to the dough.
To add the topping, flour your hands and divide the topping paste into 16 balls. Use your hands to press down on each one to form a small, flat circle. You can marble colors together as well to get a tie die effect. Place this disk onto the ball of dough, and press it down kinda firmly.
Once you’ve finished placing the topping on the buns, use a bread lame or a knife to decorate them with the traditional concha (shell) shape.
Allow the conchas to rise in a warm place until they are almost double in size. Depending on the temperature of your kitchen, this step could take anywhere from 1 to 2 hours. Do not leave them to rise any longer, because if you let them grow too much they will collapse inside the oven. Bake in a preheated oven at 325º degrees for 20 minutes, or until the bottom of the conchas are lightly golden. If you are placing more than one baking sheet in your oven, rotate them after 10-12 minutes. Move the sheet on the bottom rack to the top rack and vice versa to have an even baking.

Read the Comments +